Washington Reroofing: 10 Expert Tips to Avoid Costly Mistakes

Summary:

10 Things to Know Before You Reroof Your House in Washington Set the promise: Washington-specific checklist + step-by-step guidance to avoid costly mistakes, pass inspections, and pick materials that survive rain, wind, and moss.
Table of contents
Washington’s rain, wind, and moss: why reroofing decisions here are different That Washington-specific plan starts with our weather reality: Pineapple Express storms and atmospheric rivers (long, intense moisture bands) that soak roofs for days and push rain sideways. Along Puget Sound, salt air chews at fasteners; in the Cascades, freeze–thaw pops marginal details. Your roof isn’t just shingles—it’s a moisture and comfort system. If intake, exhaust, underlayment (the waterproof layer under your roofing), and flashing (metal water barriers) don’t work together, water finds the weak link. North-facing slopes stay damp under fir and cedar, so moss and algae root in and pry up shingle edges. Wind off the Sound drives rain under tired flashing, and low-slope sections (shallow pitches) act like catch basins. We’ve seen a shaded Ballard bungalow cut moss growth dramatically after ventilation and algae-resistant shingles. Bottom line: we design the whole system—ventilation, insulation, and drainage—so your roof works, not just looks. Frame the reader’s goal: a reroof that lasts decades, passes code, and looks great. Tease that the next section breaks down what makes Washington reroofing uniquely complex.

What makes Washington reroofing unique (and why a plan saves you money)

So What Makes Washington Reroofing Uniquely Complex?

It starts with microclimates and local rules. Seattle neighborhoods stay damp; the Eastside (Bellevue/Redmond/Kirkland) sees more freeze–thaw; Snoqualmie Valley funnels wind; Tacoma and coastal zones add salt spray. Permits run through SDCI (Seattle Department of Construction and Inspections) under the IRC (International Residential Code), and many HOAs (homeowner associations) control color and profiles. Summer dry windows book fast—expect 4–8 week lead times for reputable crews.

Because each area punishes roofs differently, planning comes first. We verify whether your low-slope porch needs membrane, confirm ventilation, and coordinate inspections before you buy materials. Some cities want tear-off photos; HOAs require submittals and samples. We handle submittals early so approvals land before the weather window. That keeps your job in sequence—demo, dry-in, inspections, then finish—without costly reschedules.

  • Wind-driven rain exposure in fall/winter storm tracks
  • Moss and algae pressure on shaded north-facing slopes
  • Local permit/inspection variations across city and county
  • Historic districts and HOA style/material restrictions
  • Tight summer calendars and contractor availability

Next up — the pitfalls Washington homeowners run into when they skip planning.

The Expensive Mistakes We See Again and Again in Washington

Covering old shingles with a new layer hides rotten decking (the wood under your roof) and traps moisture. Rubber pipe boots (the seals around plumbing vents) crack under UV and ponding, then leak into bathrooms. Shingled valleys split under heavy runoff on long Seattle gables. Clogged soffits (intake vents) bake shingles from the underside. On a Sammamish slope under firs, moss holds water like a sponge, loading every seam.

When that happens, you see slow leaks, ceiling stains, and attic mold on the sheathing. Manufacturer warranties often require proper ventilation and full tear-offs—overlays and poor airflow void coverage. Insulation gets wet and slumps, killing energy performance and comfort. Small errors at chimneys and kick-out flashing turn into soggy siding and damaged drywall. Left alone, repairs snowball into structural sheathing replacement.

We just corrected this on a Sammamish hillside: tear-off, new plywood, membrane valley, and balanced intake. If that sounds familiar, our roofing Sammamish guidance shows what to watch for on shaded lots and how we prevent repeat leaks.

  • Granule loss trails in gutters and downspouts
  • Curled, brittle, or sliding shingles on north slopes
  • Attic mildew smell after storms
  • Ceiling stains around lighting/vents
  • Exterior paint blistering near eaves

Why Status-Quo Shortcuts Fail in Our Climate

Most shingle manufacturers limit warranties if you overlay; they require a tear-off to inspect and ventilate the deck. Without removal, you can’t see rotten boards. UV and rain cycles crack rubber flashings fast, and valleys fail as water volume spikes. We also enforce safety and cleanup: tarp protection, daily debris removal, and a magnet sweep of the property—non‑negotiable.

Shortcuts look cheaper but drive hidden costs: moisture damage, callbacks, and tear-outs during the next storm. They also create hazards—loose nails in lawns and driveways, unsecured tarps, and slippery debris put families and crews at risk. Plan it right once, and you avoid paying twice.

  • Premature reroof (5–10 years early)
  • Mold remediation and drywall replacement
  • Failed inspections and re-permit fees
  • Insurance claim denials due to neglect
  • Landscaping/tire damage from leftover nails

10 things to know before you reroof your Washington home

Below is the field-tested framework we use across Puget Sound to build roofs that last and pass inspection.

1. Treat Your Roof as a System

Your roof isn’t just shingles—it’s a system of interdependent components: deck, underlayment, starter strip, ice/water shield, flashings, ventilation, and fasteners. When one fails, the others follow. We plan every layer together so nothing is left to chance.

2. Build Valleys for Volume

Puget Sound gets rain-on-rain storm events that push heavy runoff through valleys fast. We recommend open metal valleys with fewer joints to handle the volume without splitting or backing up under shingles.

3. Match Lifespans

There’s no point installing premium 50-year shingles if your pipe flashings crack in 10. We specify UV-resistant pipe flashings and metal flashings so every component lasts as long as the shingles above them.

4. Get Two Warranties

Always secure two separate warranties: one from the manufacturer covering materials and one from the contractor covering workmanship. Read the coverage limits, exclusions, and transfer terms carefully—especially if you plan to sell your home.

5. Time It Right

Watch for the signs: age (most shingles last 20–30 years), granule trails in gutters, and active leaks. Schedule your project during dry stretches—tear-off and underlayment need dry conditions to seal properly and pass inspection.

6. Always Tear Off Overlays

We require a full tear-off on every job. Overlaying hides rotten decking, traps moisture, and voids manufacturer warranties. Codes back us up—proper inspection and repair of the deck is non-negotiable.

7. Ventilate on Purpose

Balanced intake and exhaust ventilation prevents heat buildup and moisture damage year-round. We calculate NFA (net free area) for your attic space and fix blocked or painted-over soffits that choke airflow.

8. Choose WA-Ready Materials

For Washington’s climate, we favor algae-resistant architectural shingles in most applications. In heavy shade or coastal exposures with salt spray, metal roofing often outperforms and outlasts composition.

9. Demand Professional Cleanup

Every job gets a rolling-magnet nail sweep of the entire property—driveway, lawn, walkways, and flower beds. We protect landscaping with tarps and clear all debris daily. This is non-negotiable.

10. Plan for Noise and Neighbors

Reroofing is loud. We set clear expectations for daytime work hours, dumpster placement, and crew parking. We also recommend notifying your neighbors before demo day—it goes a long way.


💬 Free Washington Roof Assessment

Schedule a free Washington roof assessment—we’ll check decking, ventilation, and leak risks, then share clear options and pricing. Pick virtual or on-site—no pressure, just advice.


In Bellevue’s shade and lake winds, materials and details matter. For local guidance, see our roofing Bellevue page, then dive into materials next.

The right materials for Washington’s climate (with trade-offs)

What Should You Put on Your Roof?

Since we just covered Bellevue’s shade and winds, the next question is simple: what should you put on your roof? Different slopes, exposures, and budgets point to different materials. Use this quick comparison, and verify HOA and permit requirements before you choose.

Material Installed Cost Range (WA) Typical Lifespan Best For WA Notes
Architectural asphalt shingles $ (mid-range; varies by complexity) 20–30 years; ventilation extends life Most pitched homes statewide AR (algae-resistant) options fight moss; HOA-friendly
Metal standing seam $$ (premium; highest upfront cost) 40–70 years; repaint/fastener checks Coastal exposure or heavy-snow sheds Excellent shedding; add snow/ice guards
Cedar shake (treated) $$ (mid-to-high) 25–35 years with upkeep Rustic looks; HOA-approved neighborhoods Maintenance needed; fire and moss rules vary
Composite/synthetic slate $$ (premium) 40–50 years; verify warranty terms Premium look without heavy weight Confirm structure; older rafters may need upgrades
Low-slope membranes (TPO/PVC) $$ (depends on detail work) 20–30 years; white colors reduce heat Porches, additions, and low-slope transitions Requires experienced installer; mind edge metal and flashings

Recommend consulting locally before selecting materials; use our roofing Redmond guide as a resource for Eastside homeowners comparing options, confirming HOA requirements, and matching materials to shade, wind, and low-slope sections.


Design Attic Ventilation for Washington Moisture (and Heat)

Dialed in your material choice? Great—now longevity in Washington comes from balanced ventilation. Match intake at soffits with exhaust at ridge or box vents and size both by NFA (net free area) calculations, not guesswork. Clear blocked soffits; painted-over screens and insulation jams choke intake. And fix a common culprit we see in older Seattle and Tacoma homes: bath or kitchen fans dumping into the attic. That warm, wet air accelerates decay—think moldy sheathing, rusted nails, and soggy insulation.

Ask your contractor to calculate total NFA, confirm clear intake pathways, and show you the vent layout on a sketch. If you lack soffits, consider vented drip edge or a cor-a-vent-style intake, then add baffles to keep insulation from blocking airflow. Insulate and hard-duct bath and kitchen fans to the exterior with sealed roof caps. Result: cooler summers, drier winters, fewer ice-prone edges in foothills, and shingles that actually reach their rated life.

  • Measure attic NFA and balance intake/exhaust
  • Add baffles to keep soffit paths open
  • Use ridge or box vents matched to design
  • Vent bath/kitchen fans outdoors with insulated duct
  • Verify vapor barrier and air sealing at ceiling plane

Live in Kirkland or nearby? Request a ventilation audit—attic check, NFA sizing, and fan routing. For local context, see our roofing Kirkland page and book a quick visit.

Washington permits and inspections: what to expect

Permits and Inspections: What Washington Inspectors Want to See

Since we just measured NFA (net free area) and mapped your vents, the next question is: what will the inspector want to see? Many Washington jurisdictions require a reroof permit when you replace decking (roof sheathing), change materials, add skylights, or alter ventilation. Seattle SDCI (Seattle Department of Construction and Inspections) and nearby cities follow the state code but differ on submittals and inspections. Like-for-like overlays may be exempt, yet tear-offs with sheathing repairs usually trigger permits. Verify current rules before demo; requirements and fees change.

Want a smoother path? Pull the permit early, attach photos of existing layers, a simple roof plan, and proposed materials. Ask SDCI about STFI (subject-to-field-inspection) permits, then schedule sheathing and underlayment checks inside a dry forecast window. We tear off in sections, dry-in daily with synthetic underlayment, and keep a rain buffer day on the calendar. Confirm HOA (homeowner association) approvals and street-use needs, and set inspection times mid-morning so dew dries and details are visible.

Key Inspection Checkpoints

  • Tear-off and deck condition approval
  • Underlayment/ice-and-water shield placement
  • Flashing details at penetrations and valleys
  • Ventilation openings and net-free area
  • Final fastener patterns and edges/drip metal

When structural repairs are needed (sistering rafters, replacing rotten sheathing), involve a GC (general contractor) to coordinate permits, framing, and inspections. Our general construction Bellevue WA team handles structural scope so your reroof stays on schedule.

When to reroof in Washington (and how to keep the peace)

When Should You Reroof? A Seasonal Comparison

Timing matters almost as much as materials. Use this seasonal comparison to weigh pros and cons and plan lead times with your contractor.

Season Pros Cons Scheduling Tips
Winter Off-peak availability; cooler for crews Rain, wind, short daylight Watch forecasts; plan tarps/contingencies
Spring Mild temps; fewer heat waves Unpredictable showers Hold dates loosely; have materials staged
Summer Long dry stretches; fastest installs Peak demand; higher prices Book early; confirm crew capacity
Fall Post-summer windows; prices may soften Storms ramp up quickly Move fast on windows; protect landscaping

South-end wind events can turn fall installs into nail-biters; if you’re planning around October storms, our roofing Renton guidance covers wind clips, daily dry-in protocol, and neighbor notices so you finish before the next system hits.

Before Demo Day: Your Prep Checklist

  • Notify neighbors of dates/hours
  • Reserve parking and dumpster placement
  • Protect plants and pathways with coverings
  • Plan pet and work-from-home adjustments
  • Ask for daily cleanup and final magnet sweep

Smarter Sequencing: Pair Your Reroof with Other Upgrades

After the daily cleanup and final magnet sweep, the smartest next move is sequencing the rest of your projects. Roof first, then gutters and exterior paint, then decks and landscaping. Why? New shingles shed granules and scuff fresh paint; gutter brackets fight with painters on the fascia (the board at the roof edge); and roof tear-off dents deck boards and plants. Finish the roof and flashing, then hang gutters, paint trim, and only then set posts, railings, and plantings.

Line up trades with space between them: roof crew, 1–2 days buffer, gutter install, 24–48 hours buffer, then paint. Ask for ladder standoffs and foam pads to protect siding and new windows. If you’re staining decks, let finishes cure 48–72 hours before anyone sets ladders or stages materials nearby. Cover new concrete and plantings with breathable protection, not plastic tarps that trap moisture. Share a simple site map for dumpster, material drop, and access so sprinklers, garden beds, and play areas stay untouched.

For Eastside homeowners planning outdoor upgrades, see our guide to deck remodeling Bellevue WA to time posts, flashing, and railings with your new roof.

What This Looks Like in Sammamish, Bellevue, Tacoma, and Beyond

With your roof sequenced before gutters and decks, here’s how that planning pays off on the Eastside.

Sammamish — Shaded Cul-de-Sac near Pine Lake

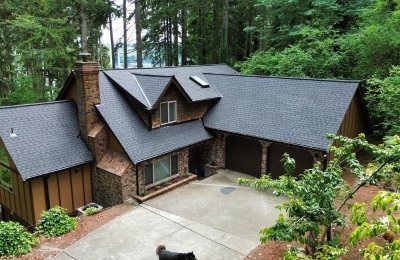
A shaded cul‑de‑sac home battled mossy valleys and a musty attic. We tore off, installed algae‑resistant (AR) architectural shingles, ran open metal valleys, and used ice‑and‑water at eaves and low‑slope transitions. We also cleared blocked soffits and balanced ridge/soffit ventilation. Result: attic relative humidity dropped 12 points in the first month, granule shedding calmed, and the next wet season didn’t bring the usual green fuzz. If your Sammamish or Bellevue lot lives under firs, this combo keeps moss from winning.

Tacoma Narrows and Browns Point — Wind-Driven Rain

Along the Tacoma Narrows and Browns Point bluffs, wind‑driven rain punished a 1970s gable. We moved to standing seam metal with concealed fasteners, high‑wind clips at 24‑inch spacing, and a full ice‑and‑water valley package. Hemmed drip edge, oversized step flashing, and a chimney cricket (a small diverter ridge) kept water moving off the walls. The ridge system was sealed for storms yet vented for summer heat escape. After two atmospheric rivers and several 50+ mph gusts, there were zero blow‑offs and no water stains. If you face Commencement Bay or open fetch winds, this is your set‑and‑forget roof.

North Tacoma, Proctor District — 1928 Bungalow Fix

A 1928 bungalow on N 27th had a mildew smell after every storm. The bath fan was dumping into the attic, and intake was choked. We re‑routed the fan with insulated hard‑duct to a roof cap, calculated NFA (net free area, the vent sizing math) and added vented drip edge for intake, then baffles to keep paths open. A low‑profile ridge vent finished the balance, and we air‑sealed can lights and top plates. Winter RH slid from ~65% to ~50%, the smell vanished, and energy bills dipped about 8%. If your ceiling spots return each winter, this is the fix.

If you’re anywhere from Old Town to the Narrows, our roofing Tacoma guide covers wind‑rated materials, flashing details, and storm scheduling so you can plan with confidence.

Your Washington pre-roof and final inspection checklist

Your Reroof Checklist: Before, During, and After

You’re ready to plan with confidence—now lock it in. Use this concise, printable checklist before, during, and after your project.

Before Demo

  • Clear driveway/parking and move vehicles
  • Cover attic storage; protect delicate items
  • Mark sprinkler heads and garden beds
  • Confirm tarp plan for sudden showers
  • Discuss daily start/stop times and cleanup

During Install

  • Inspect flashings, valleys, and penetrations
  • Confirm underlayment and drip edges at eaves/rakes
  • Check ventilation components for balance and airflow

After Completion

  • Walk the perimeter for nails/debris (magnet sweep)
  • Collect permit sign-offs and warranty documents

North-end homeowners, schedule a post-storm inspection before small leaks become big repairs. For Bothell-specific guidance, visit our roofing Bothell page.

What to Do When a Reroof Uncovers Interior Damage

That post-storm inspection you just scheduled is exactly how we catch hidden moisture; if we do find damage, sequence it like this:

Step 1 — Make the roof watertight. Repair sheathing, dry-in, and correct ventilation and exhaust runs so new leaks stop.

Step 2 — Remove and dry. Pull wet insulation and drywall, dry cavities 24–72 hours with fans/dehumidifiers, and treat any visible mold.

Step 3 — Rebuild. Air-seal the ceiling, add baffles, reinstall insulation, replace cement board or substrate, and retile or patch drywall.

Step 4 — Finish. Apply primer and paint after substrates test dry and attic relative humidity (RH) trends are stable.

Coordination Keeps It Moving

We schedule the roofer to set roof caps, flashings, and any fan or skylight penetrations first. HVAC installs the duct and sized fan (measured in CFM, cubic feet per minute) next; electrical wires a timer or humidity control and checks dedicated circuits. Interiors follow after moisture readings are under 15% in framing and subfloor. Expect a 48–72 hour drying window between demo and rebuild. Share one punch list, daily photos, and a single change-order channel. If the scope touches framing or multiple trades, we step in as your GC to keep permits, sequencing, and quality aligned.

For South Sound homeowners, coordinate bath repairs with ventilation fixes during your bathroom remodel Tacoma. We’ll size the fan, insulate ducts, and rebuild tile after the envelope is dry.

Structural Fixes and Multi-Trade Coordination (Done Right)

Since those bath repairs touch the roof and ventilation, this is where a GC keeps everything aligned. When tear-off reveals widespread rotten sheathing (roof decking) or failing eaves/fascia (the edge boards), we scope and rebuild fast. Need to move penetrations (vents, pipes) to stop leaks, integrate new skylights, or prep for solar mounts? We coordinate electricians and HVAC (heating, ventilation, and air conditioning) for dedicated fan circuits and ducting, sequence inspections, and keep you dry.

For projects on the Eastside, get a single point of accountability—see our general construction Kirkland WA service for framing, permits, and scheduling that keep your reroof and interior work on track.

FAQs about reroofing in Washington

Washington Reroofing FAQs

Since we just covered permits, framing, and scheduling with a GC, here are straight Washington answers to the questions we hear most.

How long does a reroof take in WA?

Typical single-family projects take 1–3 days once scheduled; add time for decking repairs or inspections.

Do I need a permit?

Many cities require permits, especially for decking replacement or material changes—verify with your city before work begins.

What about ice-and-water shield here?

Use at eaves/valleys or where specified by local code; coastal or high-rain areas benefit most.

Can I roof over existing shingles?

Avoid overlays to protect warranties and expose hidden damage; full tear-off is best practice.

What if it rains mid-project?

Crews should stage tarps and dry-in underlayment the same day; watch the forecast and have contingencies.

Will my HOA approve it?

Check your CC&Rs early; many require specific colors/materials and contractor submittals.

How do I compare bids?

Compare full systems (underlayment, flashing, ventilation, cleanup, warranties), not just shingle brand.


Ready for a Roof That’s Built for Washington?

Comparing full systems? Request a free roof assessment and estimate so we can inspect your roof and attic, outline options, and share clear pricing. Our licensed, insured crews build to Washington code, document details, and keep sites spotless—daily cleanup and magnet sweeps. You’ll get a written scope, timelines, and warranties without pressure.

Article details:

Share: